

YOU WILL NEED:
-3/8" or 1/2" width ribbon I suggest grosgrain because it holds it's shape nicely and won't snag or stretch when you sew it. Obviously the length depends on how long far a distance your banner needs to cover and I don't believe in over thinking this part. In my case, it was "really long", or, about 7 feet.
-fabric cut roughly the size of 1.5" x 6" with pinking shears. The kitchy charm of this is the loose thread and pinking shear edges. Everything looks cuter with pinking shear edges. I used about a dozen different cotton fabrics with large and small design patterns.
-about a million straight pins
HOW IT'S DONE:
Since I was working with a dozen different fabric styles I set them out in front of me in piles and played games with myself to create a "random" pattern. First I went from left to right, then I went right to left, then one from the top, one from the bottom. You get the gist. Just don't make yourself too crazy on this part.
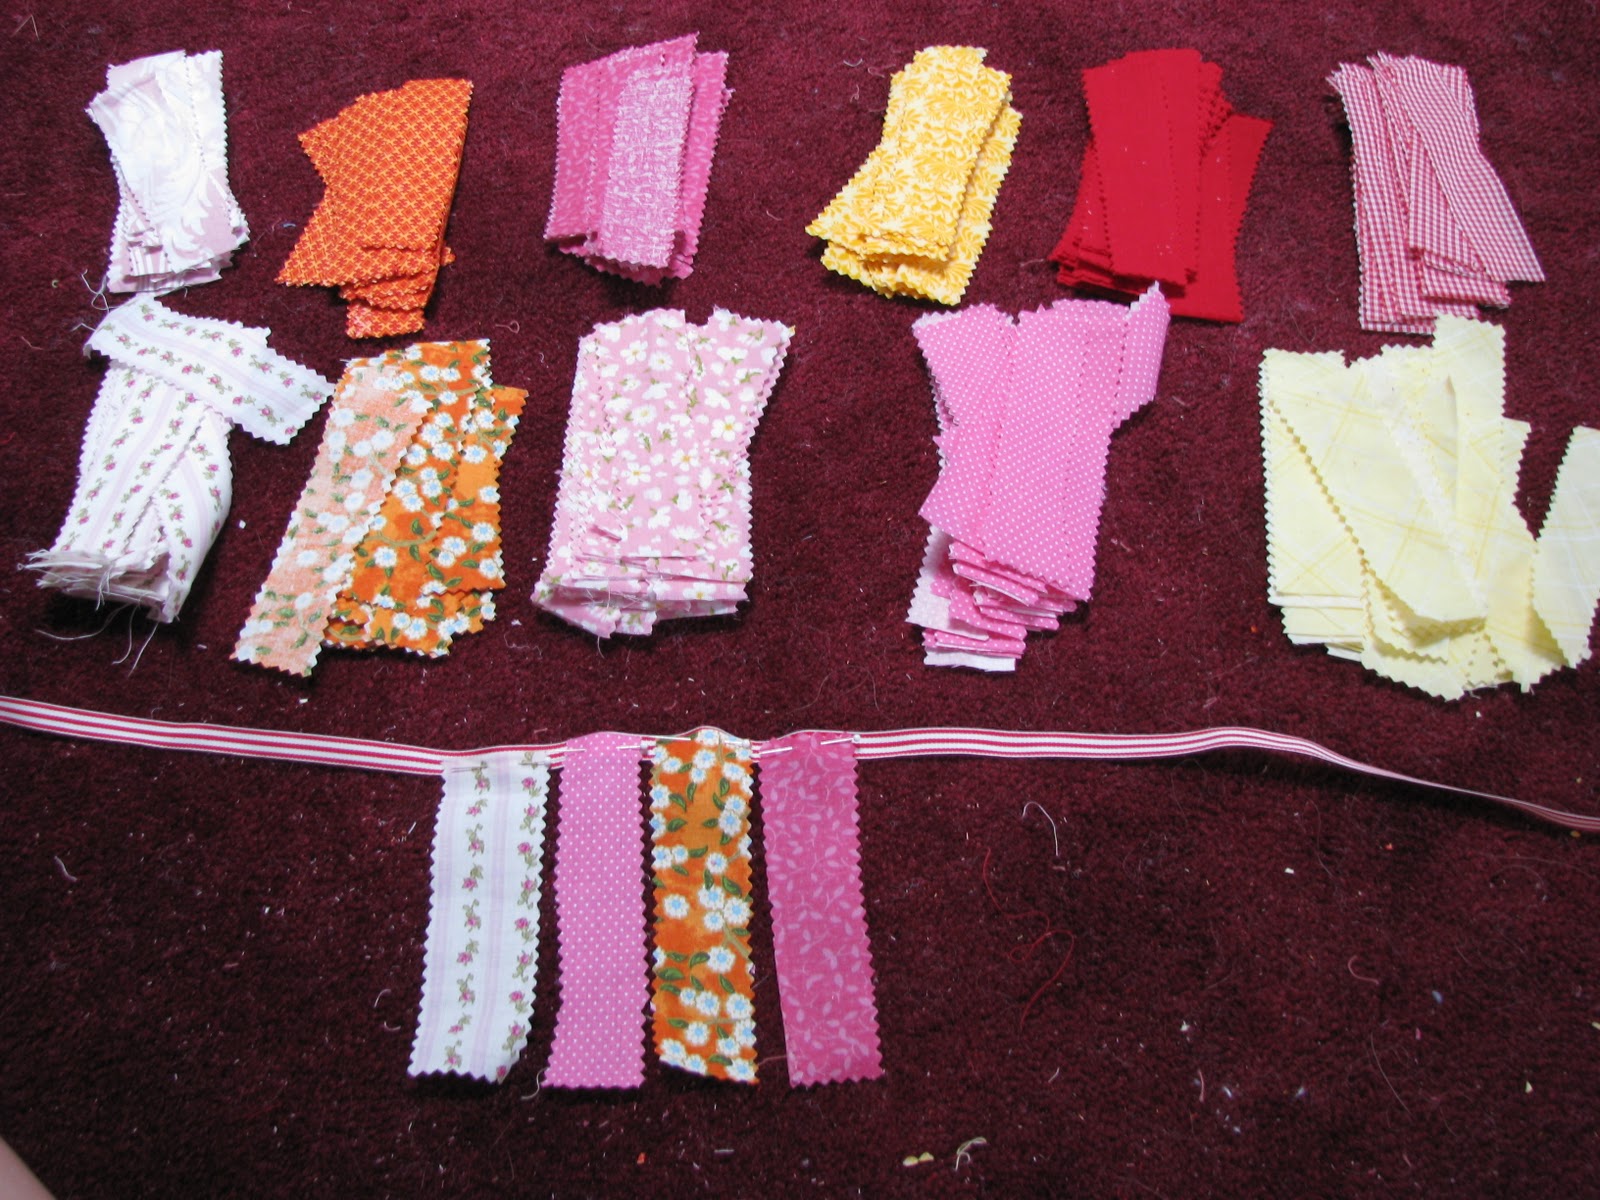
Pin the top edge of the fabric onto the ribbon, going past the half-way point, but not overhanging the top of the ribbon. Remember that you are going to sew a straight line across the center of the ribbon and you want to hit each fabric strip.
*Here is the only important rule* so read this! Pin the fabric wrong-side facing you! As you can see, I took the photo before I figured this critical fact out. That kind of thinking probably comes naturally to those experienced with sewing, but since I'm not in that group I forgot and had to re-pin half my banner. A real damper on my forward progress. Here is the corrected fringe:

Leave about 10 inches on each end of the ribbon to allow you to tie the banner onto something.
Sew a straight line down the middle of the ribbon to attach all the fabric pieces and you. are. done!
I made two banners and draped them over each other for added festivity. Here's how they looked, if you missed the original post.

SOOOOOOOOOOO stinkin' cute! Just pinned it! :) Great job, Margot!
ReplyDeleteSo pretty! I love this idea. I like how the bunting is not shaped with triangles. I think I will try this.
ReplyDelete